
By the Canvas and Wall team, Midrand · 13 July 2026
How to Install Wallpaper Yourself: A Simple DIY Guide for South African Homes (2026)
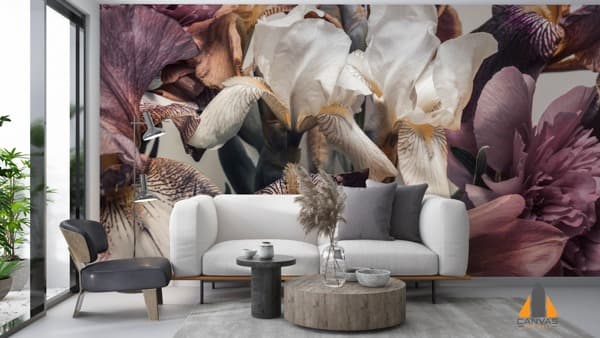
Wallpaper is having a huge moment in South African homes right now — from Sandton apartments to Durban beach houses, feature walls are replacing plain paint everywhere. The good news? You don’t need to hire a professional to get a beautiful result. With the right prep, the right tools, and a bit of patience, most homeowners can install wallpaper themselves in a weekend.
This guide walks you through the entire process, step by step, with tips specific to South African walls, climate, and what’s actually available in local hardware stores.
What You’ll Need
Before you start, gather these tools and materials:
- Wallpaper of your choice (pre-pasted or unpasted)
- Wallpaper paste (if unpasted) — available at Builders, Leroy Merlin, or your local hardware store
- A smoothing brush or plastic smoother
- A sharp trimming knife (utility knife) and spare blades
- A long straight edge or metal ruler
- A plumb line or spirit level
- Measuring tape
- A pasting table (or any long flat surface)
- A clean bucket and sponge
- Step ladder
- Pencil and scissors
South African tip: If you’re wallpapering during summer (October to February), keep the room well-ventilated but avoid direct fans or open windows blowing on wet paste — humidity and heat can cause paste to dry unevenly or too fast, especially in coastal areas like Durban or Cape Town.
Step 1: Prep the Wall Properly
This is the step most DIYers rush — and it’s the one that makes or breaks the final result.
- Clean the wall thoroughly to remove dust, grease, and cobwebs.
- Fill any cracks or holes with a wall filler and sand smooth once dry. South African homes with older plaster (common in Joburg’s northern suburbs and older Cape Town properties) often have hairline cracks that need attention first.
- Prime the wall if it’s freshly plastered, previously painted with a glossy finish, or very absorbent. A wallpaper primer (or diluted PVA) helps the paper adhere evenly and makes it easier to remove later without damaging the plaster.
- Let everything dry completely — rushing this step in humid coastal regions is a common cause of bubbling later.
Step 2: Measure and Cut Your Panels
- Measure the height of your wall and add 10cm extra at the top and bottom for trimming.
- If your wallpaper has a pattern, check the pattern repeat listed on the roll — this tells you how much extra length you’ll need so patterns match between panels.
- Cut your first few panels on a flat surface, using a straight edge to keep the cut clean.
Tip: Number your panels lightly in pencil on the back in the order you’ll hang them. This avoids mix-ups, especially with patterned or textured designs like the ones we produce at Canvas and Wall.
Step 3: Apply the Paste (If Needed)
- For pre-pasted wallpaper, follow the manufacturer’s soaking instructions (usually a quick dip in water).
- For unpasted wallpaper, apply paste evenly using a brush or roller, covering the entire back of the panel to the edges.
- Fold the pasted panel in on itself (paste side to paste side) and let it “book” for the time specified on the packaging — this activates the paste evenly.
Step 4: Hang Your First Panel
This is the most important panel of the whole job — everything else lines up from here.
- Use a plumb line or spirit level to draw a perfectly vertical line on the wall where you’ll place the edge of your first panel.
- Position the panel against this line, leaving a few centimetres of overlap at the ceiling and skirting board.
- Smooth from the centre outward using your smoothing brush, working out air bubbles as you go.
- Trim the excess at the top and bottom using your trimming knife against a straight edge for a crisp, clean line.
Step 5: Continue, Match Seams, and Finish
- Hang each subsequent panel edge-to-edge, matching the pattern carefully before smoothing it down.
- Wipe away excess paste immediately with a clean, damp sponge — dried paste is much harder to remove later.
- Pay extra attention around switches, plug points, and corners; these areas often need small, careful cuts.
- Step back regularly to check your pattern alignment under natural light — it’s much easier to catch an issue after two panels than after ten.
Common Mistakes Beginners Make
- Skipping the wall prep — leads to bubbling and poor adhesion within weeks.
- Not booking pasted paper long enough — causes uneven stretching and visible seams.
- Rushing the first panel — if it’s not perfectly plumb, every panel after it will drift out of alignment.
- Using too much paste — causes excess squeeze-out and can warp the paper’s edges.
- Ignoring humidity — in coastal or rainy-season conditions, allow extra drying time between steps.
When to Call in the Professionals
DIY wallpapering works beautifully for straightforward rooms with standard rolls and simple patterns. But some situations are worth handing over to a specialist:
- Large feature walls or murals with complex, continuous imagery that must align perfectly across multiple panels
- Custom-printed designs, oversized prints, or luxury textured wallpapers
- Uneven or heritage walls that need expert-level prep
- Commercial spaces, high ceilings, or tricky architectural features
This is exactly where Canvas and Wall comes in. We design and print custom luxury wallpaper, wall murals, and canvas art tailored to your space — and where needed, we can advise on or manage installation to make sure your investment looks flawless from day one. Whether you want a bold accent wall in your Johannesburg home or a fully custom mural for a commercial space, we handle the print quality and pattern precision so you don’t have to worry about seams or alignment issues down the line.
Thinking about a custom feature wall? Get in touch with Canvas and Wall for a free design consultation, and see how a custom print can transform your space.
Frequently Asked Questions
Can I install wallpaper over painted walls?
Yes, as long as the paint is in good condition and not glossy. Glossy paint should be lightly sanded or primed first so the wallpaper paste can bond properly.
How long does it take to wallpaper a room in South Africa’s climate?
A standard feature wall (one wall, roughly 3-4m wide) typically takes 3-5 hours including prep and drying time. Humid days may require extra drying time between steps.
Do I need special wallpaper for humid rooms like bathrooms?
Yes — look for vinyl-coated or washable wallpaper specifically rated for moisture, especially important in coastal areas like Durban and Cape Town.
What’s the difference between pre-pasted and unpasted wallpaper?
Pre-pasted paper just needs soaking in water to activate the glue, while unpasted paper requires you to apply paste manually. Pre-pasted is generally easier for first-time DIYers.
Can custom or printed murals be installed the same way as standard wallpaper?
The hanging technique is similar, but pattern alignment across large custom murals requires more precision. This is where working with a specialist like Canvas and Wall makes a real difference in the final look.
How much does professional wallpaper installation cost in South Africa?
Pricing varies by wall size, wallpaper type, and complexity. Canvas and Wall offers tailored quotes based on your specific space and design — reach out for a free consultation.
Ready to bring your feature wall to life? Explore custom wallpaper, murals, and canvas prints at Canvas and Wall, proudly serving homes and businesses across South Africa.